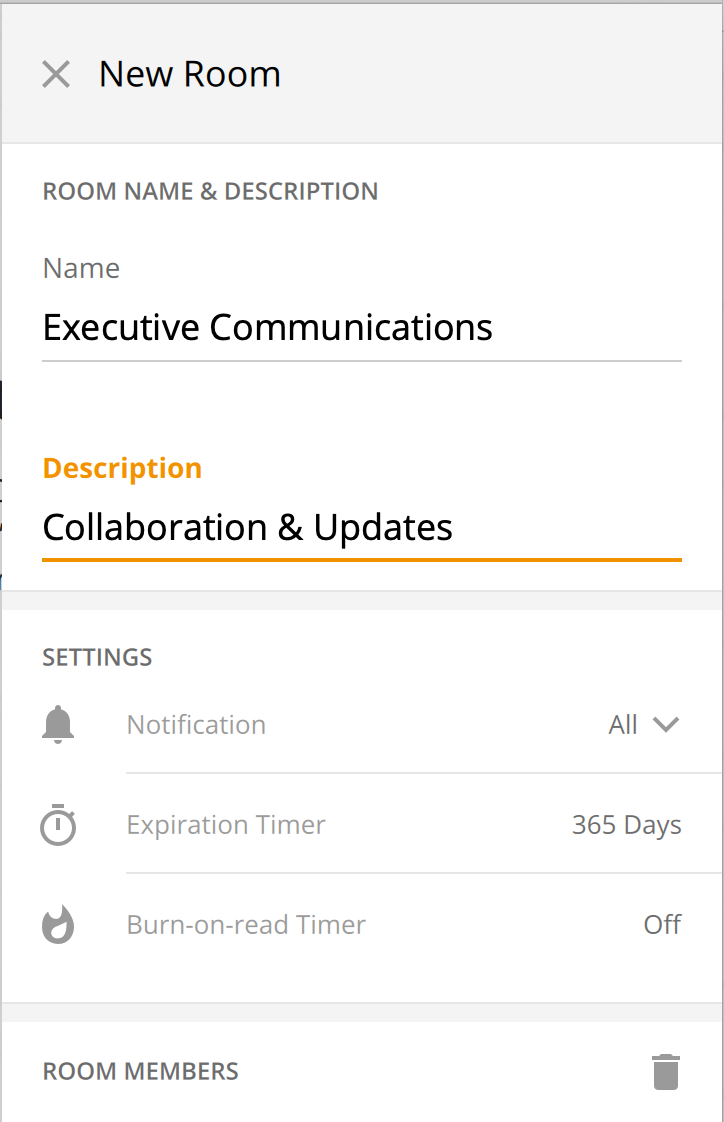
Wickr Rooms are where teams can securely communicate and collaborate. Within a Room, team members can upload files, share their screens, hold video or phone conferences, and more. Here is a quick overview on how to create and configure a new Room in Wickr Pro.
- Create a Room: On desktop, select the “+” symbol above the Room List. On mobile devices, Rooms can be created by clicking the pencil icon at the top right of the ‘Rooms” screen.
- Name the Room: Enter a name for your new Room. You also have the option to enter a description of the Room.
- Expiration Timer: Choose how long you want your messages to remain visible in the Room. For example, if you choose 30 Days, all messages and files (unless pinned to the Room) will be securely destroyed 30 days after it was sent.
- Burn-On-Read Timer: For added security on highly sensitive data, you can choose to have messages/files be securely destroyed after it is read by the recipient.
- Add Users to the Room: Uses can be added using the Directory (people in your existing network) or using the Contacts list (people outside your existing network). You can also use the search feature to type in names or emails directly.
- Edit Settings: After your Room is created, you can always go back into your Room settings to change the configuration and add/remove users.

